We are absolutely delighted to be sharing Part Two of the Luna x Wind in the Willows Cross Over.
As you may know we had the wonderful and incredibly talented Cynthia Treen with us for a weekend hosting Wind in the Willows Workshops. Cynthia’s little felty world is much smaller than Luna’s but if you want them all to be able to picnic together beneath a willow tree – here are the instructions on making a miniature armature Luna.
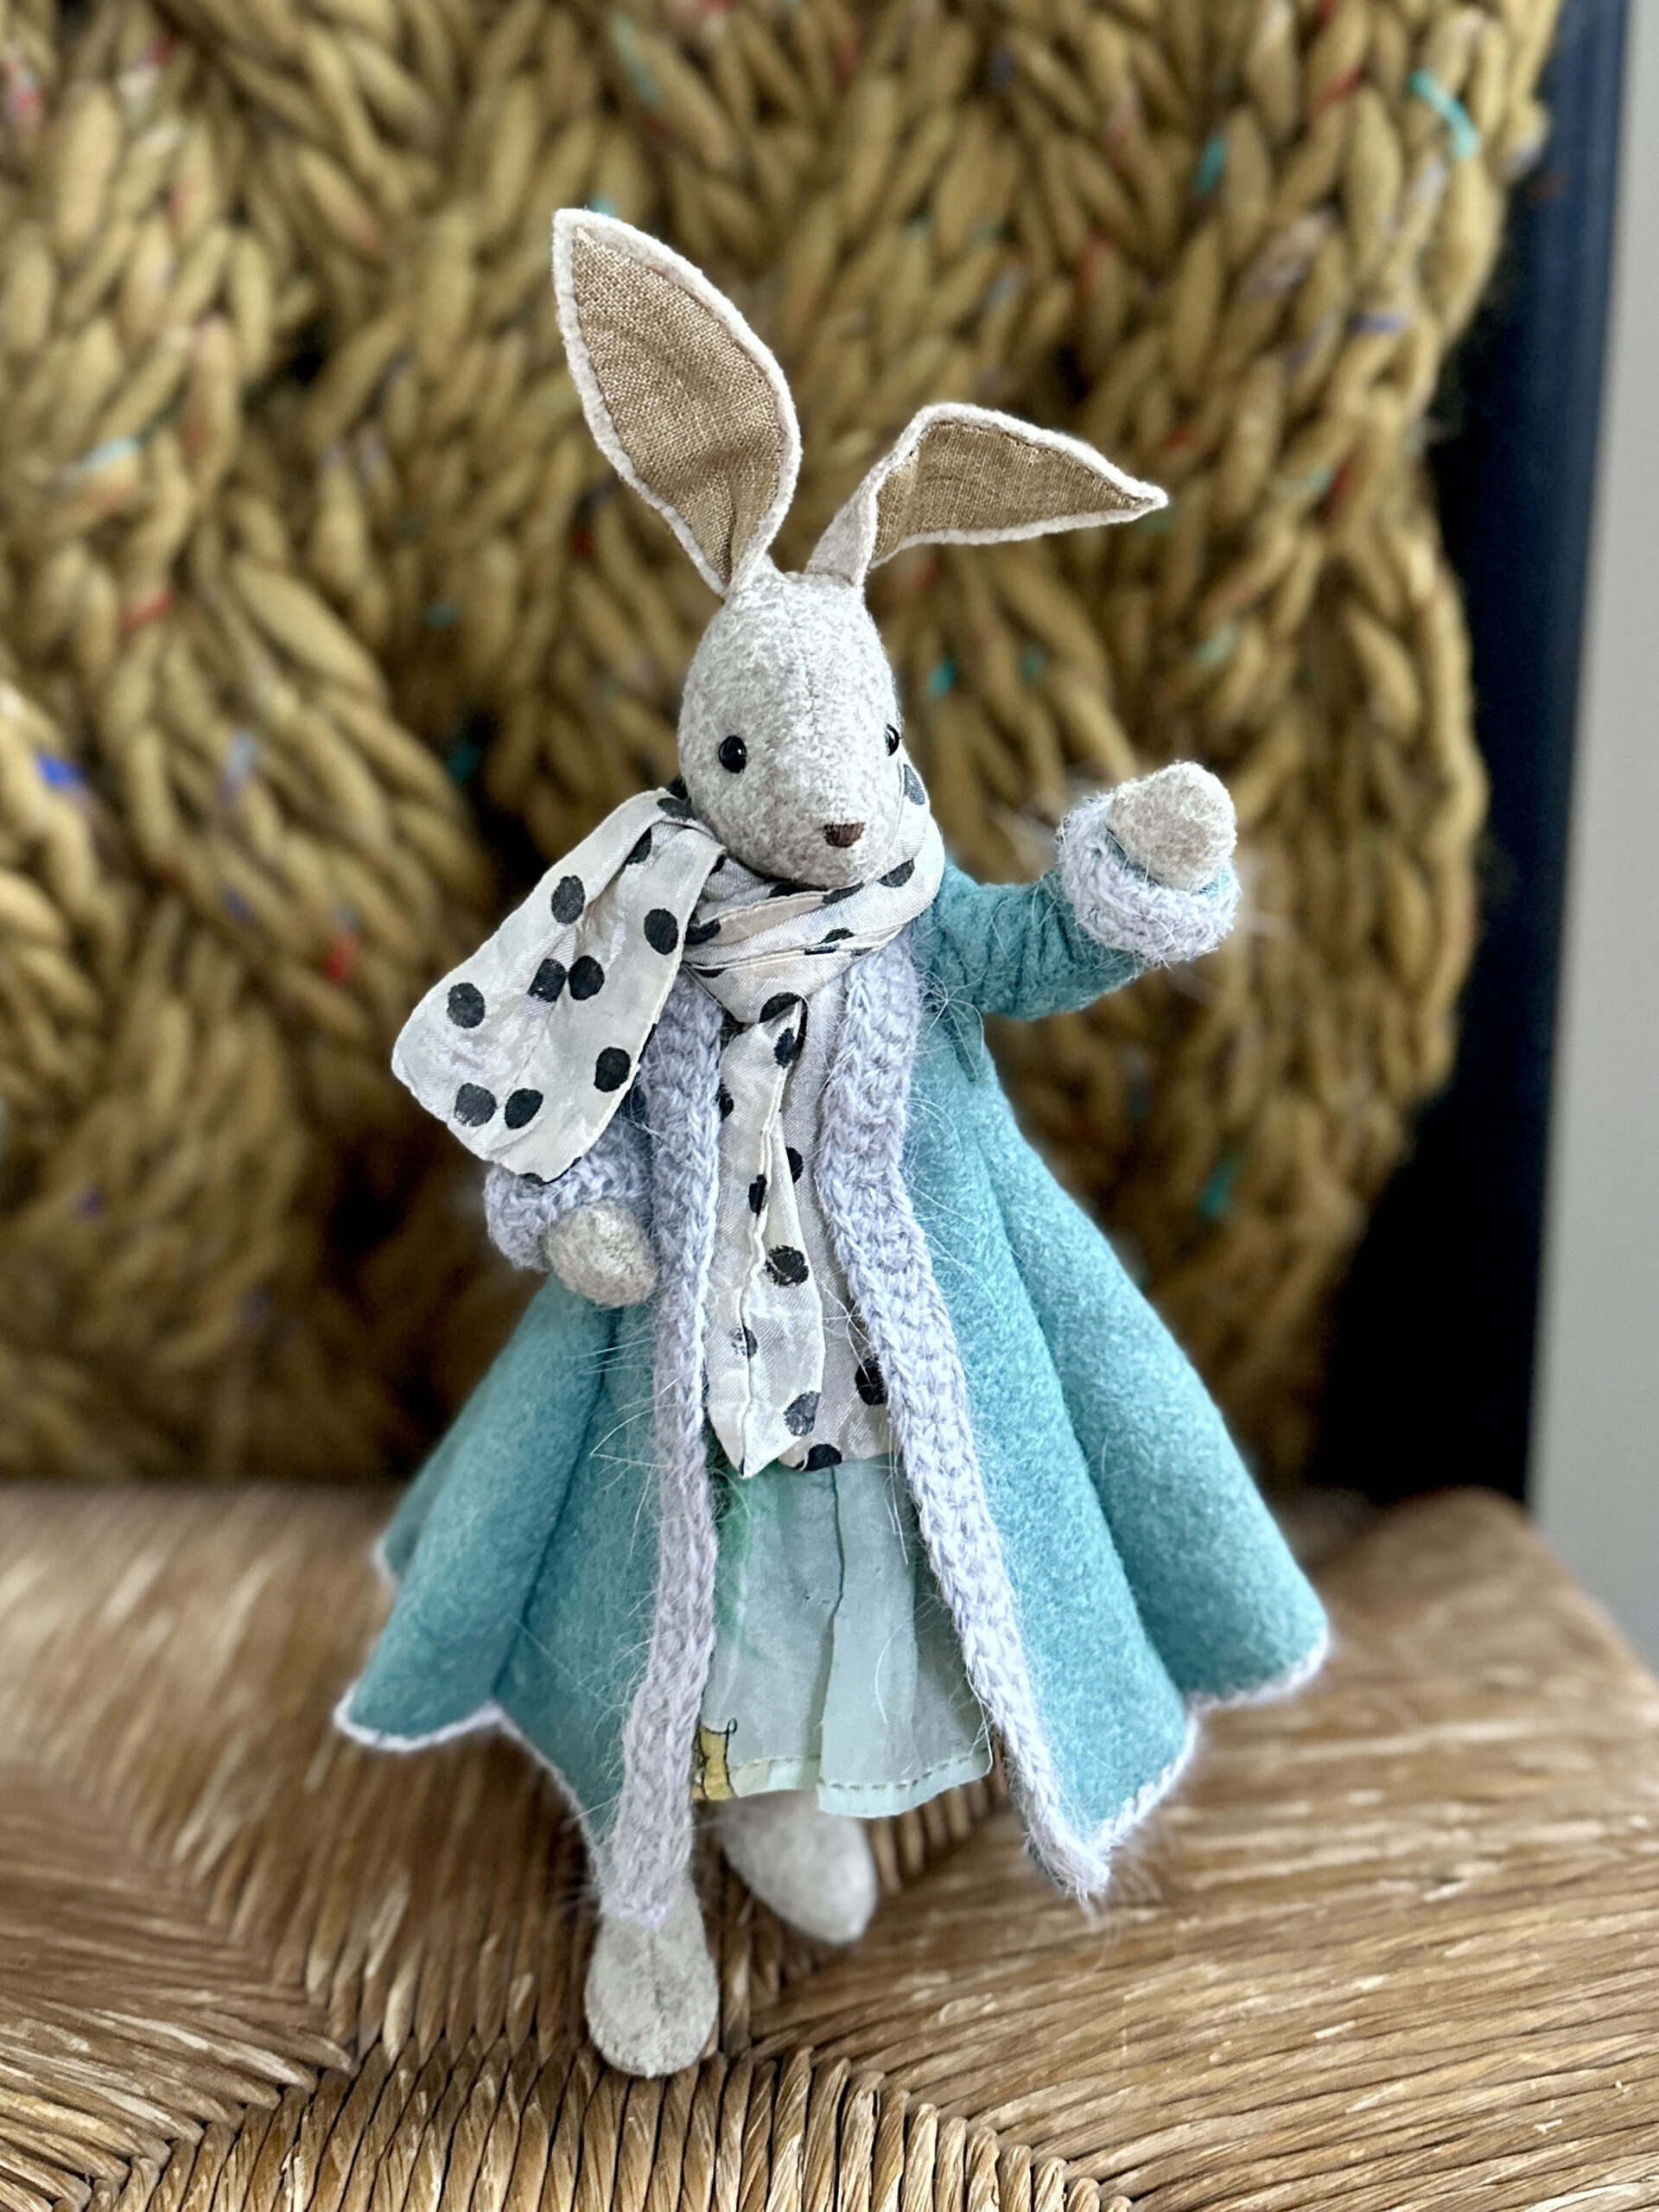
I have been a fan of Luna since I first discovered her, but alas, she is a beautiful Amazon beside my tiny collection of threadfollower critters. Initially, I admired her from afar and watched her community grow as Sara created more delightful books, patterns, and stories. With the writing on Wind in the Willows Felt Friends, I was out flat for a while, but Luna was always in the back of my mind – in miniature! This summer, after settling from a few moves and the completion of Wind in the Willows, I decided to indulge myself in creating her likeness. I scaled Luna down to 55%, which put her slightly larger than my animal patterns and in scale with my doll pattern (available on my Patreon). What a joy she was to create! Mini Luna now stands about 25.5cm (10 inches) tall from feet to ears – rather like a big sister to my animals. I could not help wiring her body as I like to do and stabilizing her feet with a chipboard. When she was complete, I was thrilled that she could stand on her own ! It was a wonderful diversion to create from Sara’s patterns, and I was pleased that she received such a warm welcome on the Luna FB page. After several requests and Sarah’s blessing, I buckled down to create a process tutorial. She is true to Sara’s original pattern (at 55%, but I made a few minor adjustments to accommodate her new petite scale.
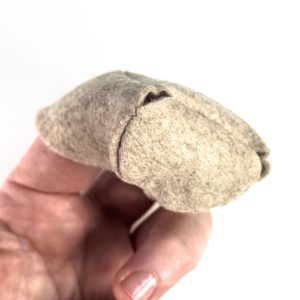
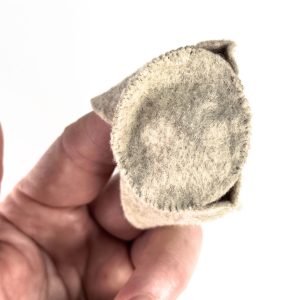
The Body
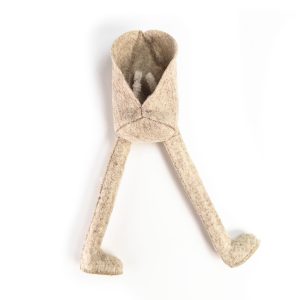
19. Whipstitch the three body panels together (use a single strand of thread).
20. Connect the pieces at the base with a few stitches, leaving the back seam open.
21. Baste the base into the body, leaving “gap” holes at the front two seams. The base should be a bit large, allowing a generous opening for attaching the legs. I left the piece with its original seam allowance (not necessary for hand stitching felt at this scale) to allow for the leg hole gaps.
22. Whipstitch the base into the body (use a single strand of thread), leaving open holes for the legs.
23. Turn the body right-side-out.

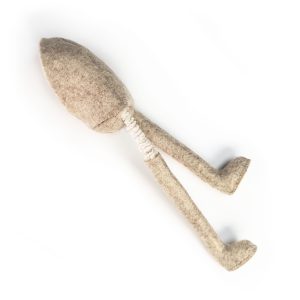
Attaching The Legs
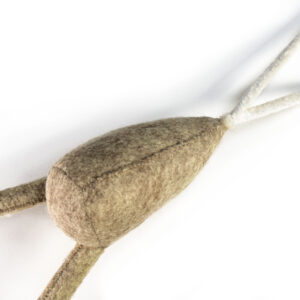
24. Insert the leg wire through the leg holes.
25. Back view of pipe cleaner in the body cavity.
26. Bind the pipe cleaner ends together with thread, knotting off to secure it.
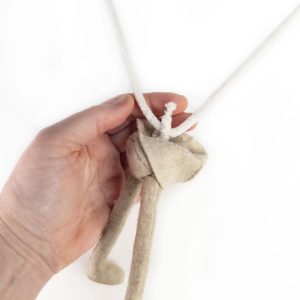
27. Slip a full length of pipe cleaner through the bound leg assembly and fold it in half.
28. Twist the pipe cleaner “spine” up to, but not beyond, the top of the body.
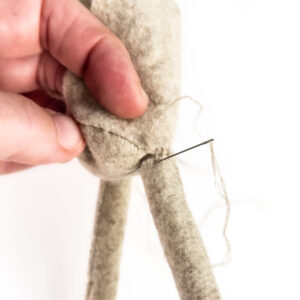
29. Blind stitch (ladder stitch) the legs to the body (use two strands of thread). After every few stitches, pull taught to tighten the stitch and make it invisible. Repeat on both legs.
Attaching the Head
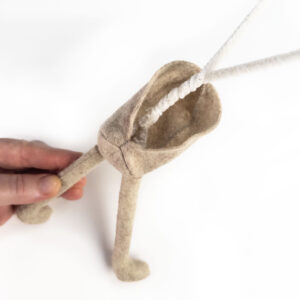
30. Begin stuffing the body cavity before stitching up the back. Get stuffing around the pipe cleaner spine – front, sides, and back. Then whipstitch up the back seam about 2/3 of the way and finish stuffing. Stuff the body enough that when you attach the arms, it will not collapse. It does not need to be as firm as the head, but be generous.
31. Finish the final seam stitching, allowing the pipe cleaner to protrude out the top. Cut the exposed pipe cleaner to about 2.5cm (1in), then fold its cut ends to reduce its length by half. Bind the ends as you did with the other pipe cleaners in the previous steps.
32. Tuck in the neck flange.
33. Cut a channel for the neck pipe cleaner.
34. The cut hole will look something like this.
35. Insert the bound neck pipe cleaners into the stuffing channel in the head.
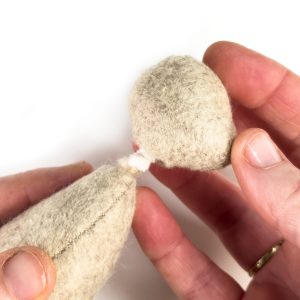
36. Blind stitch the head to the body using two strands of thread for strength. Make two passes around for good measure.
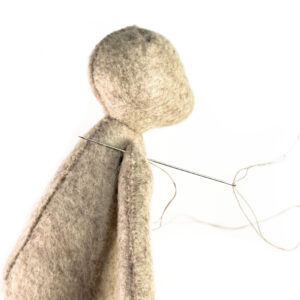
Attaching The Arms
37. Use a long darner and two strands of thread (floss) to attach the arms. Stitch back and forth through the body to secure them. If you hit the pipe cleaner wire as you stitch, adjust the needle to avoid it and continue. Pass back and forth several times until you feel the arms are securely attached.
38. End by exiting the needle beneath the shoulder and knot off. You can further hide the knot by inserting the needle through the hole it came out of and popping the ending knot beneath the felt surface
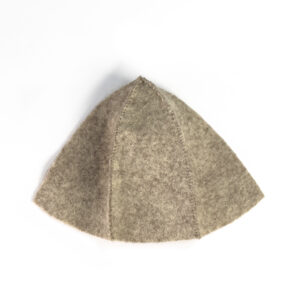
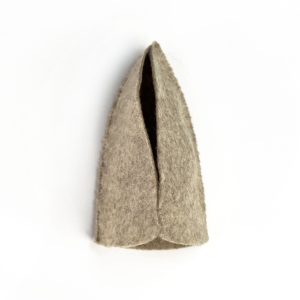
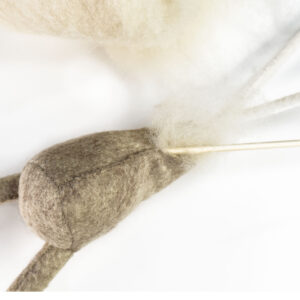
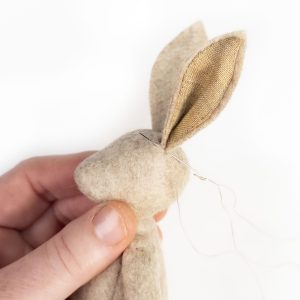
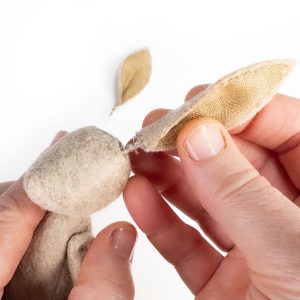
39. Cut channels in the wool stuffing at the ear darts to accept the ear wire.
40. Insert the ear wire into the cut channels.
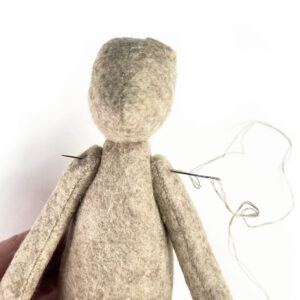
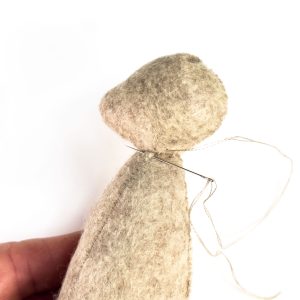
The Face
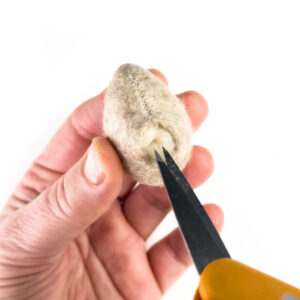
41. Stitch the ears to the head with a single strand of thread (floss). Hide the starting knot beneath the felt edge on the head side. Make each whipstitch in two passes – first scooping the head…
42. Then, on the second pass, catch the ear only. I call these odd versions of whipstitches hybrids because they combine extra elements as we do here – passing through an ear as we make each stitch.
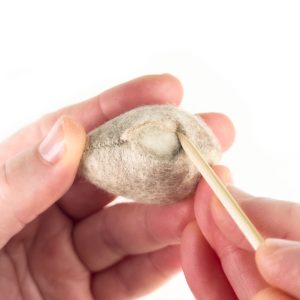
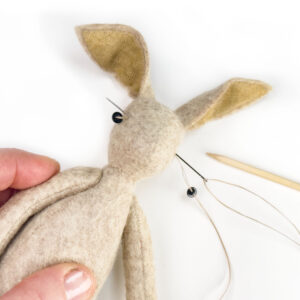
43. Make a hole for each eye with the point of a bamboo skewer. I used 5mm eyes for this scale, Luna. Two strands of thread are used here for strength. Knot the thread end and insert the long darner through the head at the eye holes to lodge the knot in the fibre. Add the first eye, then pass back through the head to the other side, but avoid over-tightening. Slip the second eye onto the needle and pass it back through the head in the opposite direction, being careful not to catch the previous thread on your way*. Pass through the head and both eyes three times, then tighten the thread, indenting the eyes slightly as you do. * If you catch the thread with the point of your needle, it will not pull through and tighten properly; simply cut the thread and begin again.
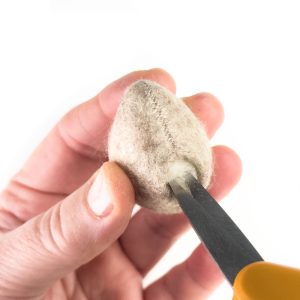
44.Embroider the nose with two strands of thread (floss). Graduate the stitches to form a triangle shape. I like to stop before a point forms.
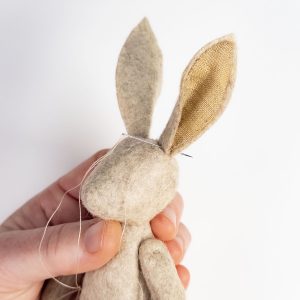

Congratulations, your mini Luna is complete.
Are we able to buy the mini Luna pattern please
I’m a little late to this particular party but so very glad I made it. I have loved making mini Luna. Big Luna was my first cool crafting felt toy, the first of many friends who have followed but mini Luna took me to new levels of learning. Thank you Cynthia and Sara.
Is it possible to send todays newsletter ive
Permanently deleted it, being organised
Many thanks ❤️🐰